Important changes to repositories hosted on mbed.com
Mbed hosted mercurial repositories are deprecated and are due to be permanently deleted in July 2026.
To keep a copy of this software download the repository Zip archive or clone locally using Mercurial.
It is also possible to export all your personal repositories from the account settings page.
Dependencies: M2XStreamClient WiConnect Nucleo_Sensor_Shield jsonlite mbed
Fork of m2x-MEMS_ACKme_Wifi_demo by
You are viewing an older revision! See the latest version
Adding Sensors and Cloud Connectivity
ACKme WiFi Shield, Nucleo Sensors, and M2X Demo
This example demonstrates how to use the ACKme WiFi shield to upload data obtained from ST's Nucleo sensors shield to the cloud (M2X) with the STM32F411 Nucleo board:
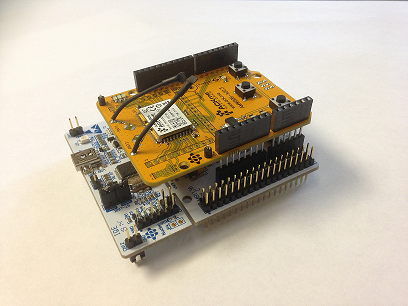
First, attach the ACKme WiFi shield to the Nucleo board as shown here:

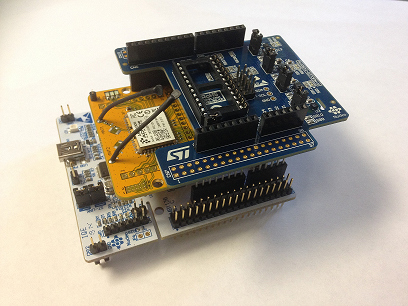
Next, attach the sensor shield to the WiFi shield as shown here:

These two shields must be connected in this order as they will not fit in the opposite order.
Next, connect the STM32F411 Nucleo board to your PC with a USB cable.
The mbed page for the ACKme WiConnect Host Library is found here:
Import libraryWiConnect
Host library for controlling a WiConnect enabled Wi-Fi module.
The mbed page for the AT&T M2X Stream Client Library is found here:
Import libraryM2XStreamClient
ARM mbed M2X API Client: The ARM mbed client library is used to send/receive data to/from AT&T's M2X service from mbed LPC1768 microcontrollers.
Note
Refer to http://mbed.org/teams/ST-Americas-mbed-Team/wiki/Getting-Started-with-ATT-M2X for setting up your M2X account.
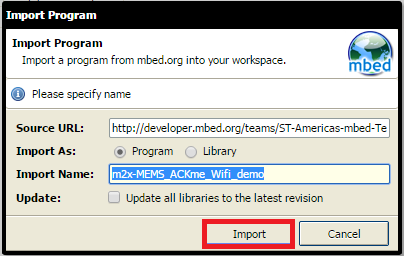
Now return to the m2x-MEMS_ACKme_Wifi_demo project homepage and import the project into your mbed compiler:

Click “Import” button on the pop up window shown below

Enter the SSID name and password of your local WiFi hotspot in the #define NETWORK_SSID and #define NETWORK_PASSWORD
Modify the lines regarding the key, feed, and stream to your own M2X account/Blueprint.
Information
The M2X information is obtained from the M2X Blueprint you should have already created. Refer to Getting Started with M2X for details.
Compile and load the image onto the F411 Nucleo board
Note
Refer to Getting Started with mbed and the STM32F411 Nucleo Board to learn how to compile and load a program onto the Nucleo board
Open a terminal window to display the status of your program. For this example, make sure that Receive is set to LF and transmit is set to CR, and set the terminal BAUD rate to 9600
Note
Refer to Creating Console Output for setting a terminal emulator
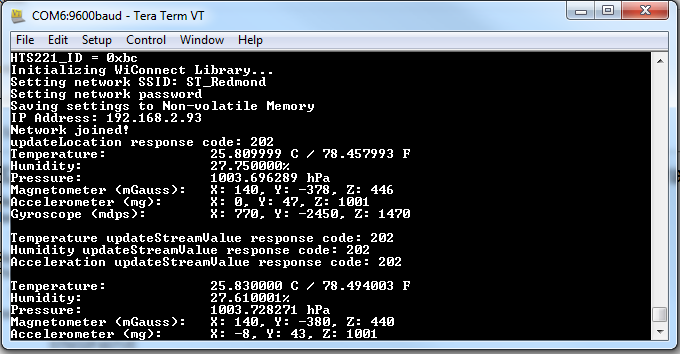
You should see the following on the screen (upon reset).

Information
M2X will return a code of 202 upon successful update to your M2X Blueprint.


