Important changes to repositories hosted on mbed.com
Mbed hosted mercurial repositories are deprecated and are due to be permanently deleted in July 2026.
To keep a copy of this software download the repository Zip archive or clone locally using Mercurial.
It is also possible to export all your personal repositories from the account settings page.
Dependencies: GR-PEACH_video GraphicsFramework R_BSP LCD_shield_config
You are viewing an older revision! See the latest version
Homepage
Note
For a sample program of with GR-PEACH 4.3 inch LCD Shield, please refer to RGA_HelloWorld_4_3inch.
GR-PEACH 4.3 inch LCD Shield用のサンプルプログラムについては、 RGA_HelloWorld_4_3inchを参照ください。
License
When you use this program, we judge you have agreed to the following contents.
本プログラムを使用する際は、以下の内容に合意した事になります。
Information
Japanese version is available in lower part of this page.
このページの後半に日本語版が用意されています.
What is this ?
RGA(Renesas Graphics Architecture) sample program using GR-PEACH.
The following lists features of the RGA.
- Allows high-speed drawing using the hardware acceleration.
- The API created based on the W3C standard HTML Canvas 2D Context achieves easy learning.
In addition, the RGA provides C++API that is operable as an interface that is backward compatible with HTML Canvas 2D Context. - The memory area was defined by the application is available as a drawing destination or for input images.
- Allows drawing of translucent images and translucent drawing using an alpha mask.
Please refer to the following link about RGA.
https://www.renesas.com/en-us/software/D3018075.html
This sample program draws in the frame buffer by using the buffer drawing mode of RGA.
In addition, supporting compiler is only ARMCC.
Composition
GR-PEACH and LCD Shield.
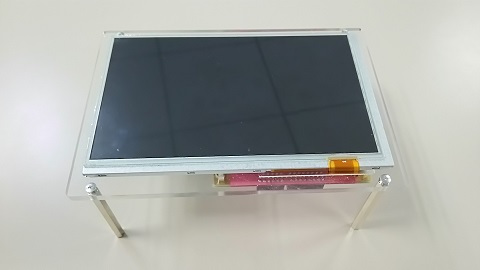
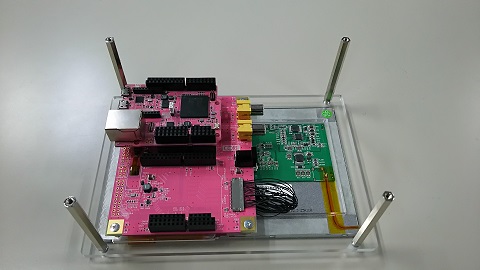
How to use
- Please connect GR-PEACH and LCD Shield. Then turn on the power to GR-PEACH.
- Please press the reset button of GR-PEACH.
- The top screen which "RGA Library Sample" is drawn is displayed on the LCD.
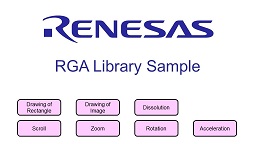
- There are seven touch buttons at the bottom of the top screen.When you press each button, the function of RGA that have been linked to the panel is executed, and the output image will be displayed on the LCD.
Please refer to the "Drawing using the RGA" below about the function of RGA that have been linked to the panel. - When RGA of the execution is completed, "Return Top Screen" button displaies at the top right of the screen. When you press it, the top screen is displayed.
Drawing using the RGA
| Touch Button | Discriptions |
| Drawing of Rectangle | Drawing the rectangle. The sample program draws a rectangle in the range that you swaipe on the LCD. 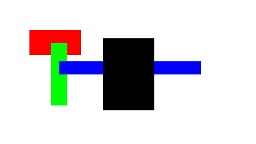 |
| Drawing of Image | Draw the image. The sample program draws by overlapping the two images(flower and crystal image). In addition, the sample program draws a picture of Crystal to the swipe position on the LCD. 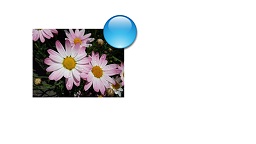 |
| Dissolution | Dissolve by carry out the fade-in and the fade-out at the same time. The sample program draws by overlapping the two images. And the sample program draws while changing the transparency of the two images by the swipe operation of sideways on the LCD.  |
| Scroll | Scroll the image. The sample program draws while shifting the position of cutting out of the rendering source by the swipe operation of sideways on the LCD while fixing the display position of the drawing destination.  |
| Zoom | Zoom the image. The sample program draws while changing the size of cutting out of the rendering source by the swipe operation of sideways on the LCD while fixing the display position of the drawing destination.  |
| Rotation | Rotate the image. The sample draws the image while changing the tilt by the swipe operation of sideways on the LCD.  |
| Acceleration | Movement of the image along with the acceleration. The sample program draws while moving the image from right to left along with the acceleration. You can select the type of the following acceleration in LCD touch operation. - ease ...... Move smoothly the start and the end (default) - linear ...... Move constant speed - ease-in ...... Move slowly the start - ease-out ...... Move slowly the end - ease-in-out ...... Move slowly the start and the end  |
About image to be drawn
Image files that are used in the sample program is easily possible replacement by using the "Convert Image to Binary Table" tool below.
This tool generates "BinaryImage_RZ_A1H.c" and "BinaryImage_RZ_A1H.h" in the Images folder and converts each image file to binary. Then, this tool outputs the data to "RGA_Sample_BinaryImage" table of "BinaryImage_RZ_A1H.c" and defines the macro name indicating the offset position in the table to "BinaryImage_RZ_A1H.h".
The sample program executes with reference to this macro name for offset.
Convert Image to Binary Table
File Description
| Folder and File | Discriptions | |
| Images folder | ||
| BinaryImage_RZ_A1H.c | [Output File] Source file which binary table is generated | |
| BinaryImage_RZ_A1H.h | [Output File]Header file which macro name for the offset is defined | |
| BinaryImageConfigRGAH.image.xml | Setting file | |
| *.jpg, *.png, *.bmp | [Input File] Image files for drawing | |
| scriptlib folder | ||
| Files omitted | Command files called from a script | |
| RGA_Tools.vbs | Script file | |
| BinaryImageMakeRGAH.bat | Execute file |
How to use
- Please download the "Convert Image to Binary Table" tool and unzip it.
- Please put the image file to the Images folder and edit "BinaryImageConfigRGAH.image.xml".
- Please execute "BinaryImageMakeRGAH.bat". Then, "BinaryImage_RZ_A1H.c" and "BinaryImage_RZ_A1H.h" is generated.
- Please replace "BinaryImage_RZ_A1H.c" and "BinaryImage_RZ_A1H.h" in your program to the generated files.
- If necessary, please change macro name for the offset that is referenced in your program.
- Please build your program
概要
GR-PEACHを使ったRGA(ルネサスグラフィックスライブラリ)サンプルプログラムです。
RGAの特徴は以下の通りです。
- ハードウェア アクセラレーションを使って高速に描画
- W3C 標準である HTML Canvas 2D Context をベースに作成した API のため、学習が容易。
また HTML Canvas 2D Context の下位互換として動作できる C++API を提供 - アプリケーション側で用意したメモリー領域を描画先、または、入力画像として使用可能
- 半透明な画像の描画と、アルファマスクを使った任意の形状の描画
RGAの詳細については、以下を参照下さい。
https://www.renesas.com/ja-jp/software/D3018074.html
本サンプルプログラムでは、RGAのバッファー描画モードを使ってフレームバッファに描画しています。
なお、対応するコンパイラはARMCCのみです。
構成
GR-PEACH、LCDシールド


使い方
- GR-PEACHとLCDシールドを接続し、GR-PEACHに電源を入れます。
- GR-PEACHのリセットボタンを押します。
- "RGA Library Sample"というトップ画面がLCDに表示されます。

- 画面下に7個のタッチボタンがあり、それぞれを押すと、各パネルに紐付けられたRGAの機能が実行され、その出力画像がLCDに表示されます。
パネルに紐付けられたRGAの機能については、下記"RGAを使った描画"を参照下さい。 - RGA機能の実行が終わると、画面右上に"Return Top Screen"のボタンが表示されますので、押すとトップ画面に戻ります。
RGAを使った描画
| タッチボタン | 説明 |
| Drawing of Rectangle | 四角形の描画を行ないます。 サンプルでは、LCD上をスワイプさせた範囲に四角形を描画します。  |
| Drawing of Image | 画像を描画を行ないます。 サンプルでは、2つの画像(花とクリスタルの画像)を重ねて描画します。 LCD上をスワイプした位置にクリスタルの画像を描画します。  |
| Dissolution | フェードインとフェードアウトを同時に行うことでディゾルブを行ないます。 サンプルでは、2つの画像を重ねて表示して、LCD上の横方向のスワイプ操作によって2つの画像の透明度を変化させながら描画します。  |
| Scroll | 画像のスクロールを行ないます。 サンプルでは、描画先の表示位置は固定のまま、LCD上の横方向のスワイプ操作によって描画元の取り出す位置をずらしながら描画します。  |
| Zoom | 画像のズームを行ないます。 サンプルでは、描画先の表示位置は固定のまま、LCD上の横方向のスワイプ操作によって描画元の取り出すサイズを変化させながら描画します。  |
| Rotation | 画像の回転を行ないます。 サンプルでは、LCD上の横方向のスワイプ操作によって傾きを変化させながら画像を描画します。  |
| Acceleration | 加速を伴って画像の移動を行ないます。 サンプルでは、加速を伴って、画像を右から左に移動させながら描画します。 LCDのタッチ操作で以下の加速の種類を選択できます。 - ease …… 開始と終了が滑らかに動く(デフォルト) - linear …… 一定の速度 - ease-in …… 開始がゆっくり動く - ease-out …… 終了がゆっくり動く - ease-in-out …… 開始と終了がゆっくり動く  |
描画する画像について
サンプルプログラムで使用している画像ファイルは、下記の"Convert Image to Binary Table"ツールを利用する事で、簡単に差し替えが可能です。
このツールは、Imagesフォルダ内にBinaryImage_RZ_A1H.c ファイルと BinaryImage_RZ_A1H.h ファイルを生成し、各画像ファイルをバイナリ変換します。そして、そのデータをBinaryImage_RZ_A1H.c ファイルのRGA_Sample_BinaryImageテーブルに出力し、BinaryImage_RZ_A1H.h ファイルにテーブル内のオフセット位置を示すマクロ名を定義します。
サンプルプログラムでは、オフセット用のマクロ名を参照して動作します。
Convert Image to Binary Table
ファイル説明
| フォルダ、ファイル | 説明 | |
| Imagesフォルダ | ||
| BinaryImage_RZ_A1H.c | [出力ファイル] バイナリテーブルが生成されるソースファイル | |
| BinaryImage_RZ_A1H.h | [出力ファイル] オフセット用のマクロ名が定義されるヘッダファイル | |
| BinaryImageConfigRGAH.image.xml | 設定ファイル | |
| *.jpg, *.png, *.bmp | [入力ファイル] 描画用の画像ファイル | |
| scriptlibフォルダ | ||
| ・・・ファイル省略・・・ | スクリプトから呼ばれるコマンドファイル | |
| RGA_Tools.vbs | スクリプトファイル | |
| BinaryImageMakeRGAH.bat | 実行ファイル |
使い方
- "Convert Image to Binary Table"ツールをダウンロードして解凍します
- Imagesフォルダ内に画像ファイルを入れ、BinaryImageConfigRGAH.image.xmlを編集します
- BinaryImageMakeRGAH.batを実行し、BinaryImage_RZ_A1H.cとBinaryImage_RZ_A1H.hを生成します
- 生成されたファイルをプログラム内のBinaryImage_RZ_A1H.cとBinaryImage_RZ_A1H.hと置き換えます
- 必要であれば、プログラム内で参照しているオフセット用のマクロ名を変更します
- プログラムをビルドします