Important changes to repositories hosted on mbed.com
Mbed hosted mercurial repositories are deprecated and are due to be permanently deleted in July 2026.
To keep a copy of this software download the repository Zip archive or clone locally using Mercurial.
It is also possible to export all your personal repositories from the account settings page.
Dependencies: Pixart_OFN
Fork of OFN_P3007_Demo by
You are viewing an older revision! See the latest version
Guide for nRF52 DK Platform
This Wiki page provides a detailed guide on how to setup and operate PixArt's PAW3007 sensor with the Nordic nRF52-DK microcontroller.
Hardware
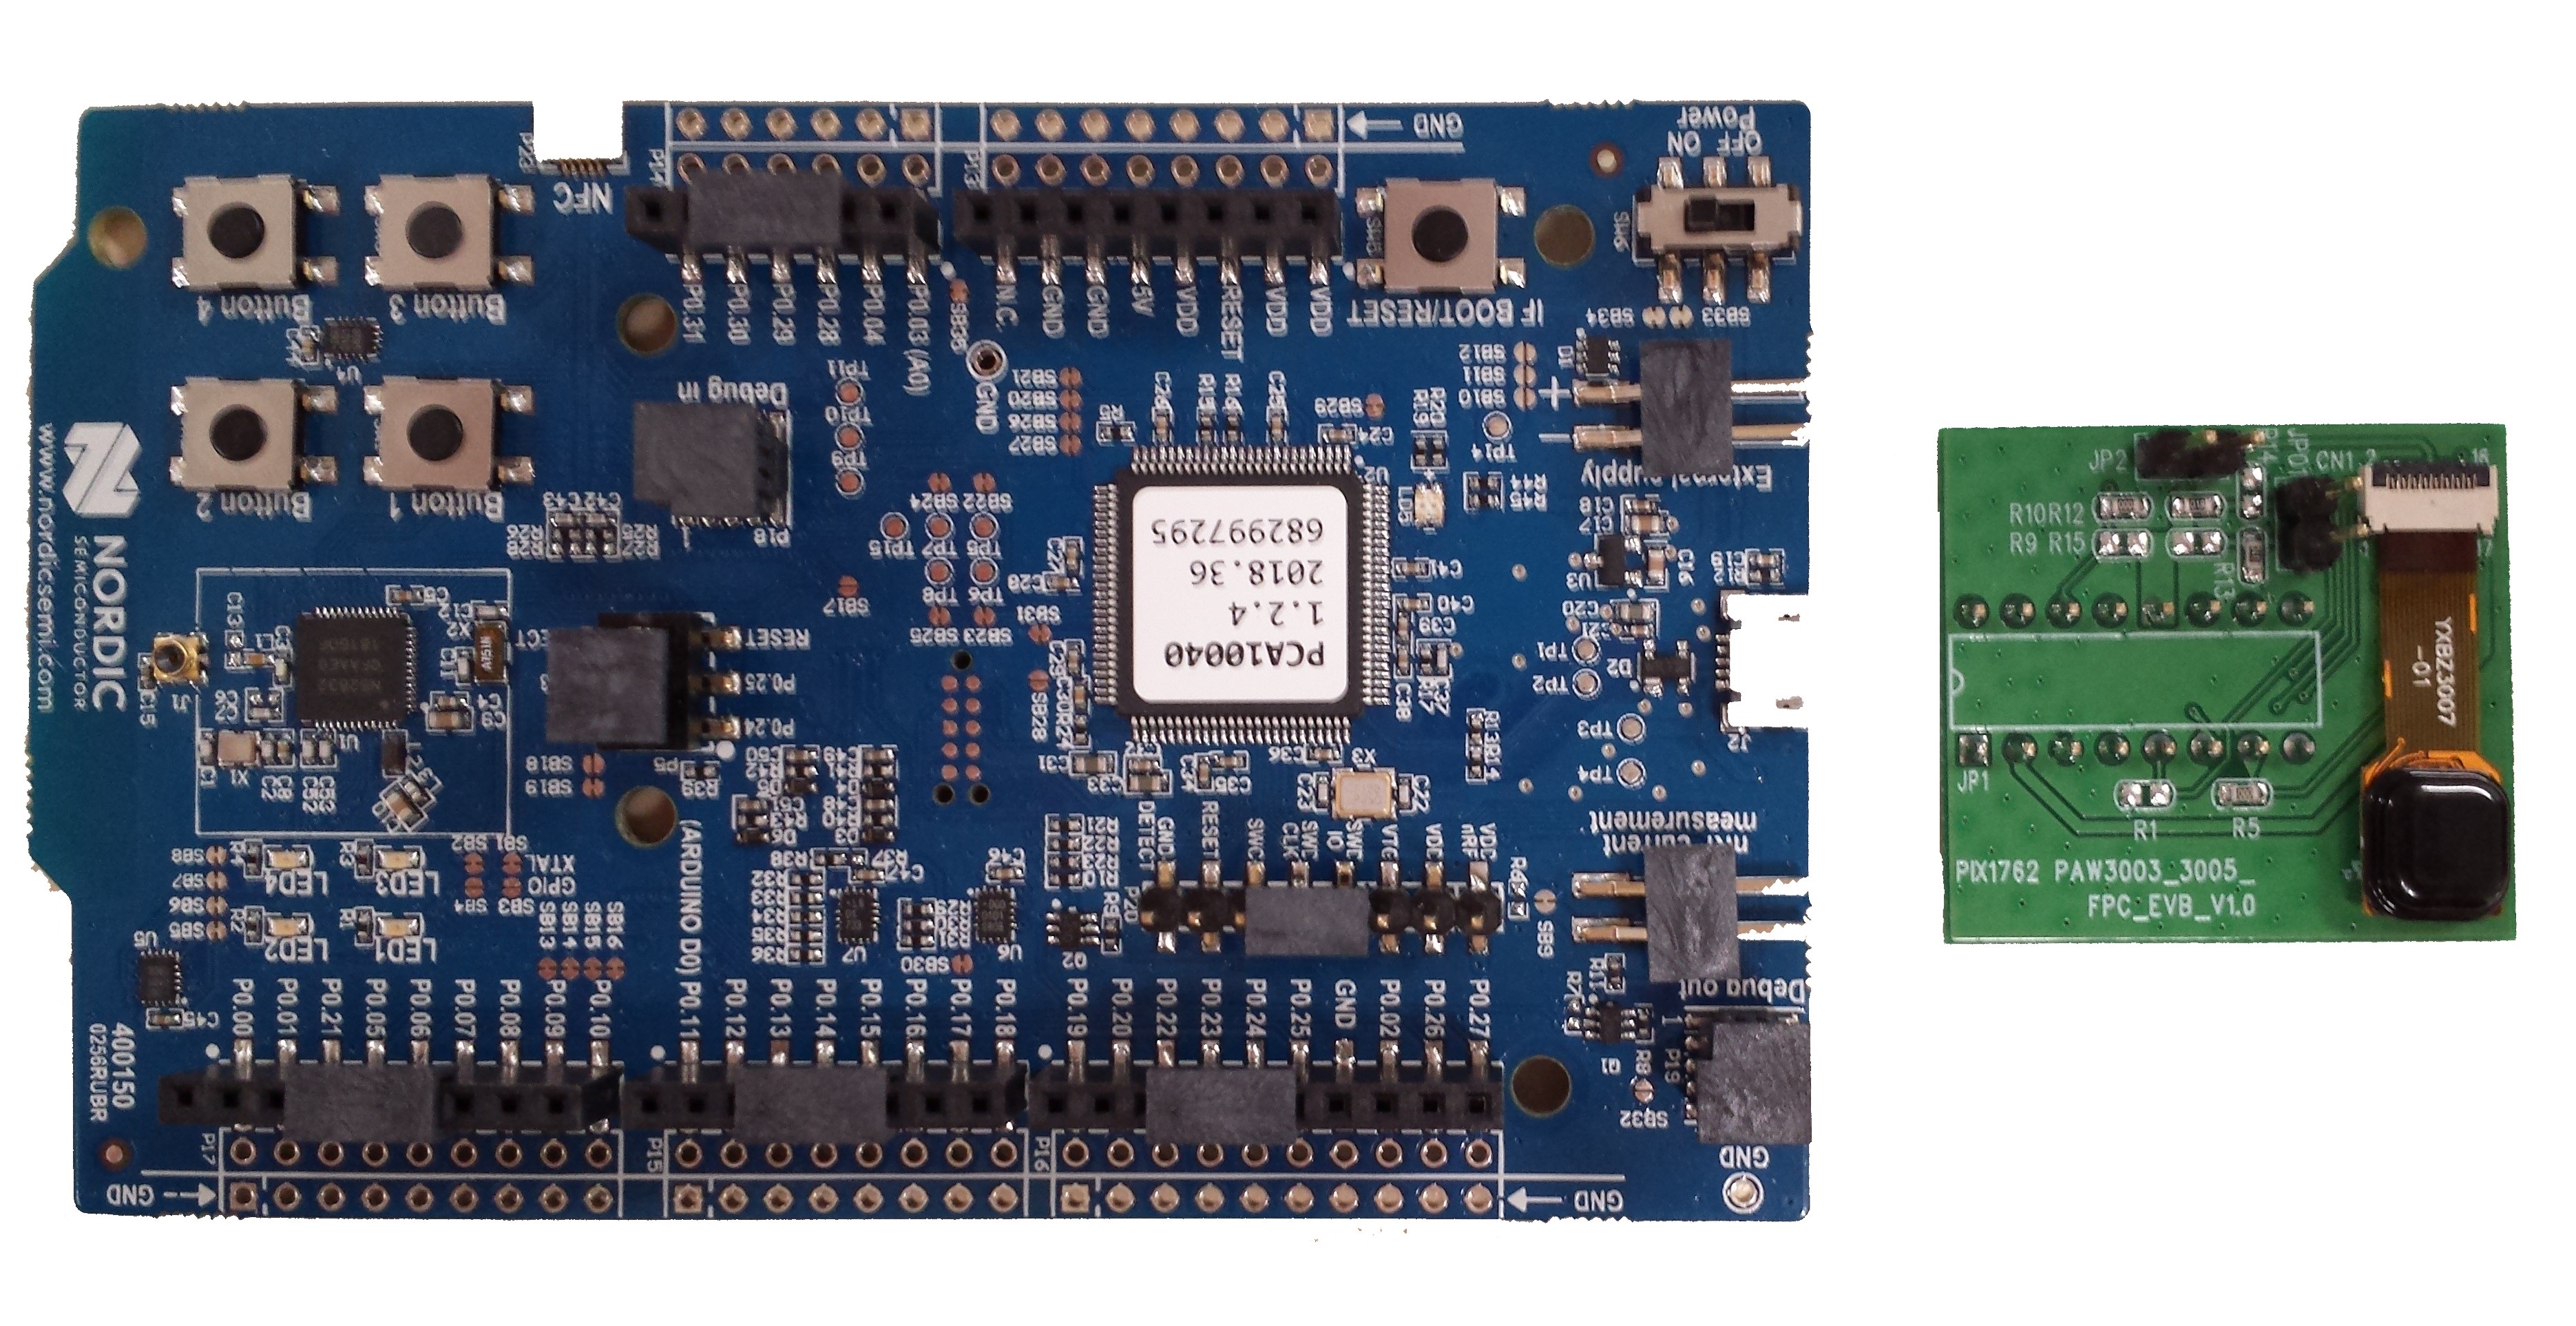
- 1.) PC with Windows Operating System
- 2.) Nordic nRF52 Microcontroller
- 3.) PAW3007 Evaluation Board
- 4.) USB Cable (USB-A Male to Micro-USB Male)
- 5.) Jumper Cables
- NOTE: PC not included in image.
Importing Code
First, we need to import code into the microcontroller to start talking to the sensor. For the firmware code, please visit this product's components page.
- 1.) Login/create an mBed account.
- 2.) Import the reference firmware into mBed's online compiler using the "Import program" button. You can find this in the link above.

- 3.) When importing the program, make sure you import it as a program and not a library.
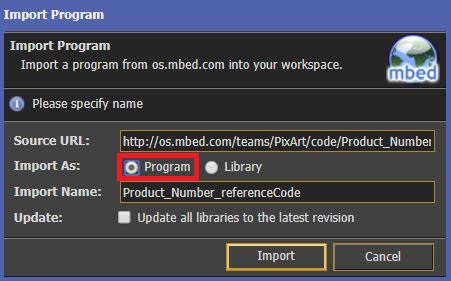
- 4.) Make sure the selected platform is the Nordic nRF52-DK.

- 5.) Make sure your Nordic nRF52 microcontroller is plugged into your PC. It should show up as a separate drive similar to the (C:) drive. Then, you can compile the program and save the HEX file into your microcontroller.

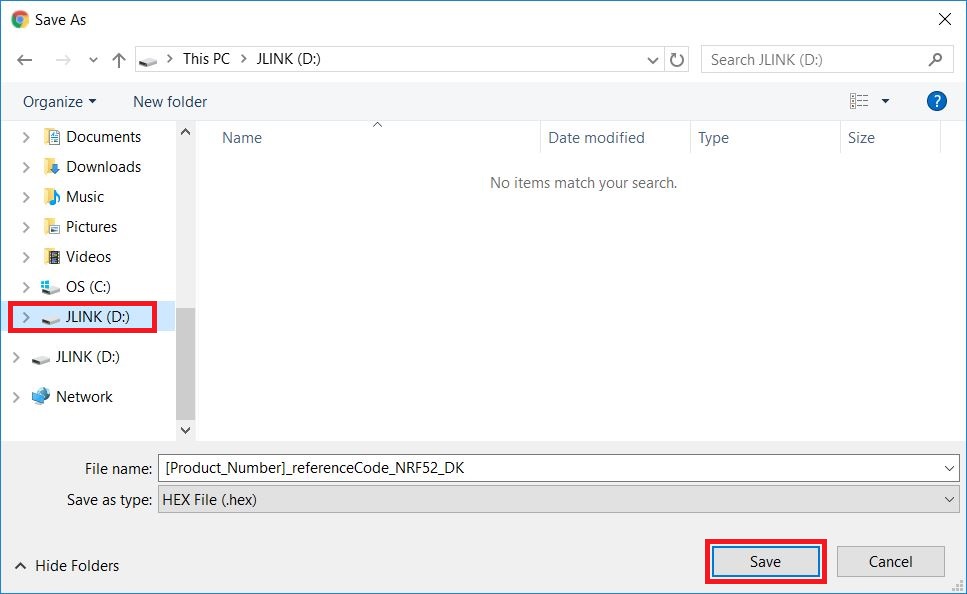
- NOTE: If you suspect your code did not import properly, please try unplugging the device, plugging it back in, and then re-compiling and saving the code into the device.
Connection
Please refer to the images and notes below for details on how to connect your hardware.
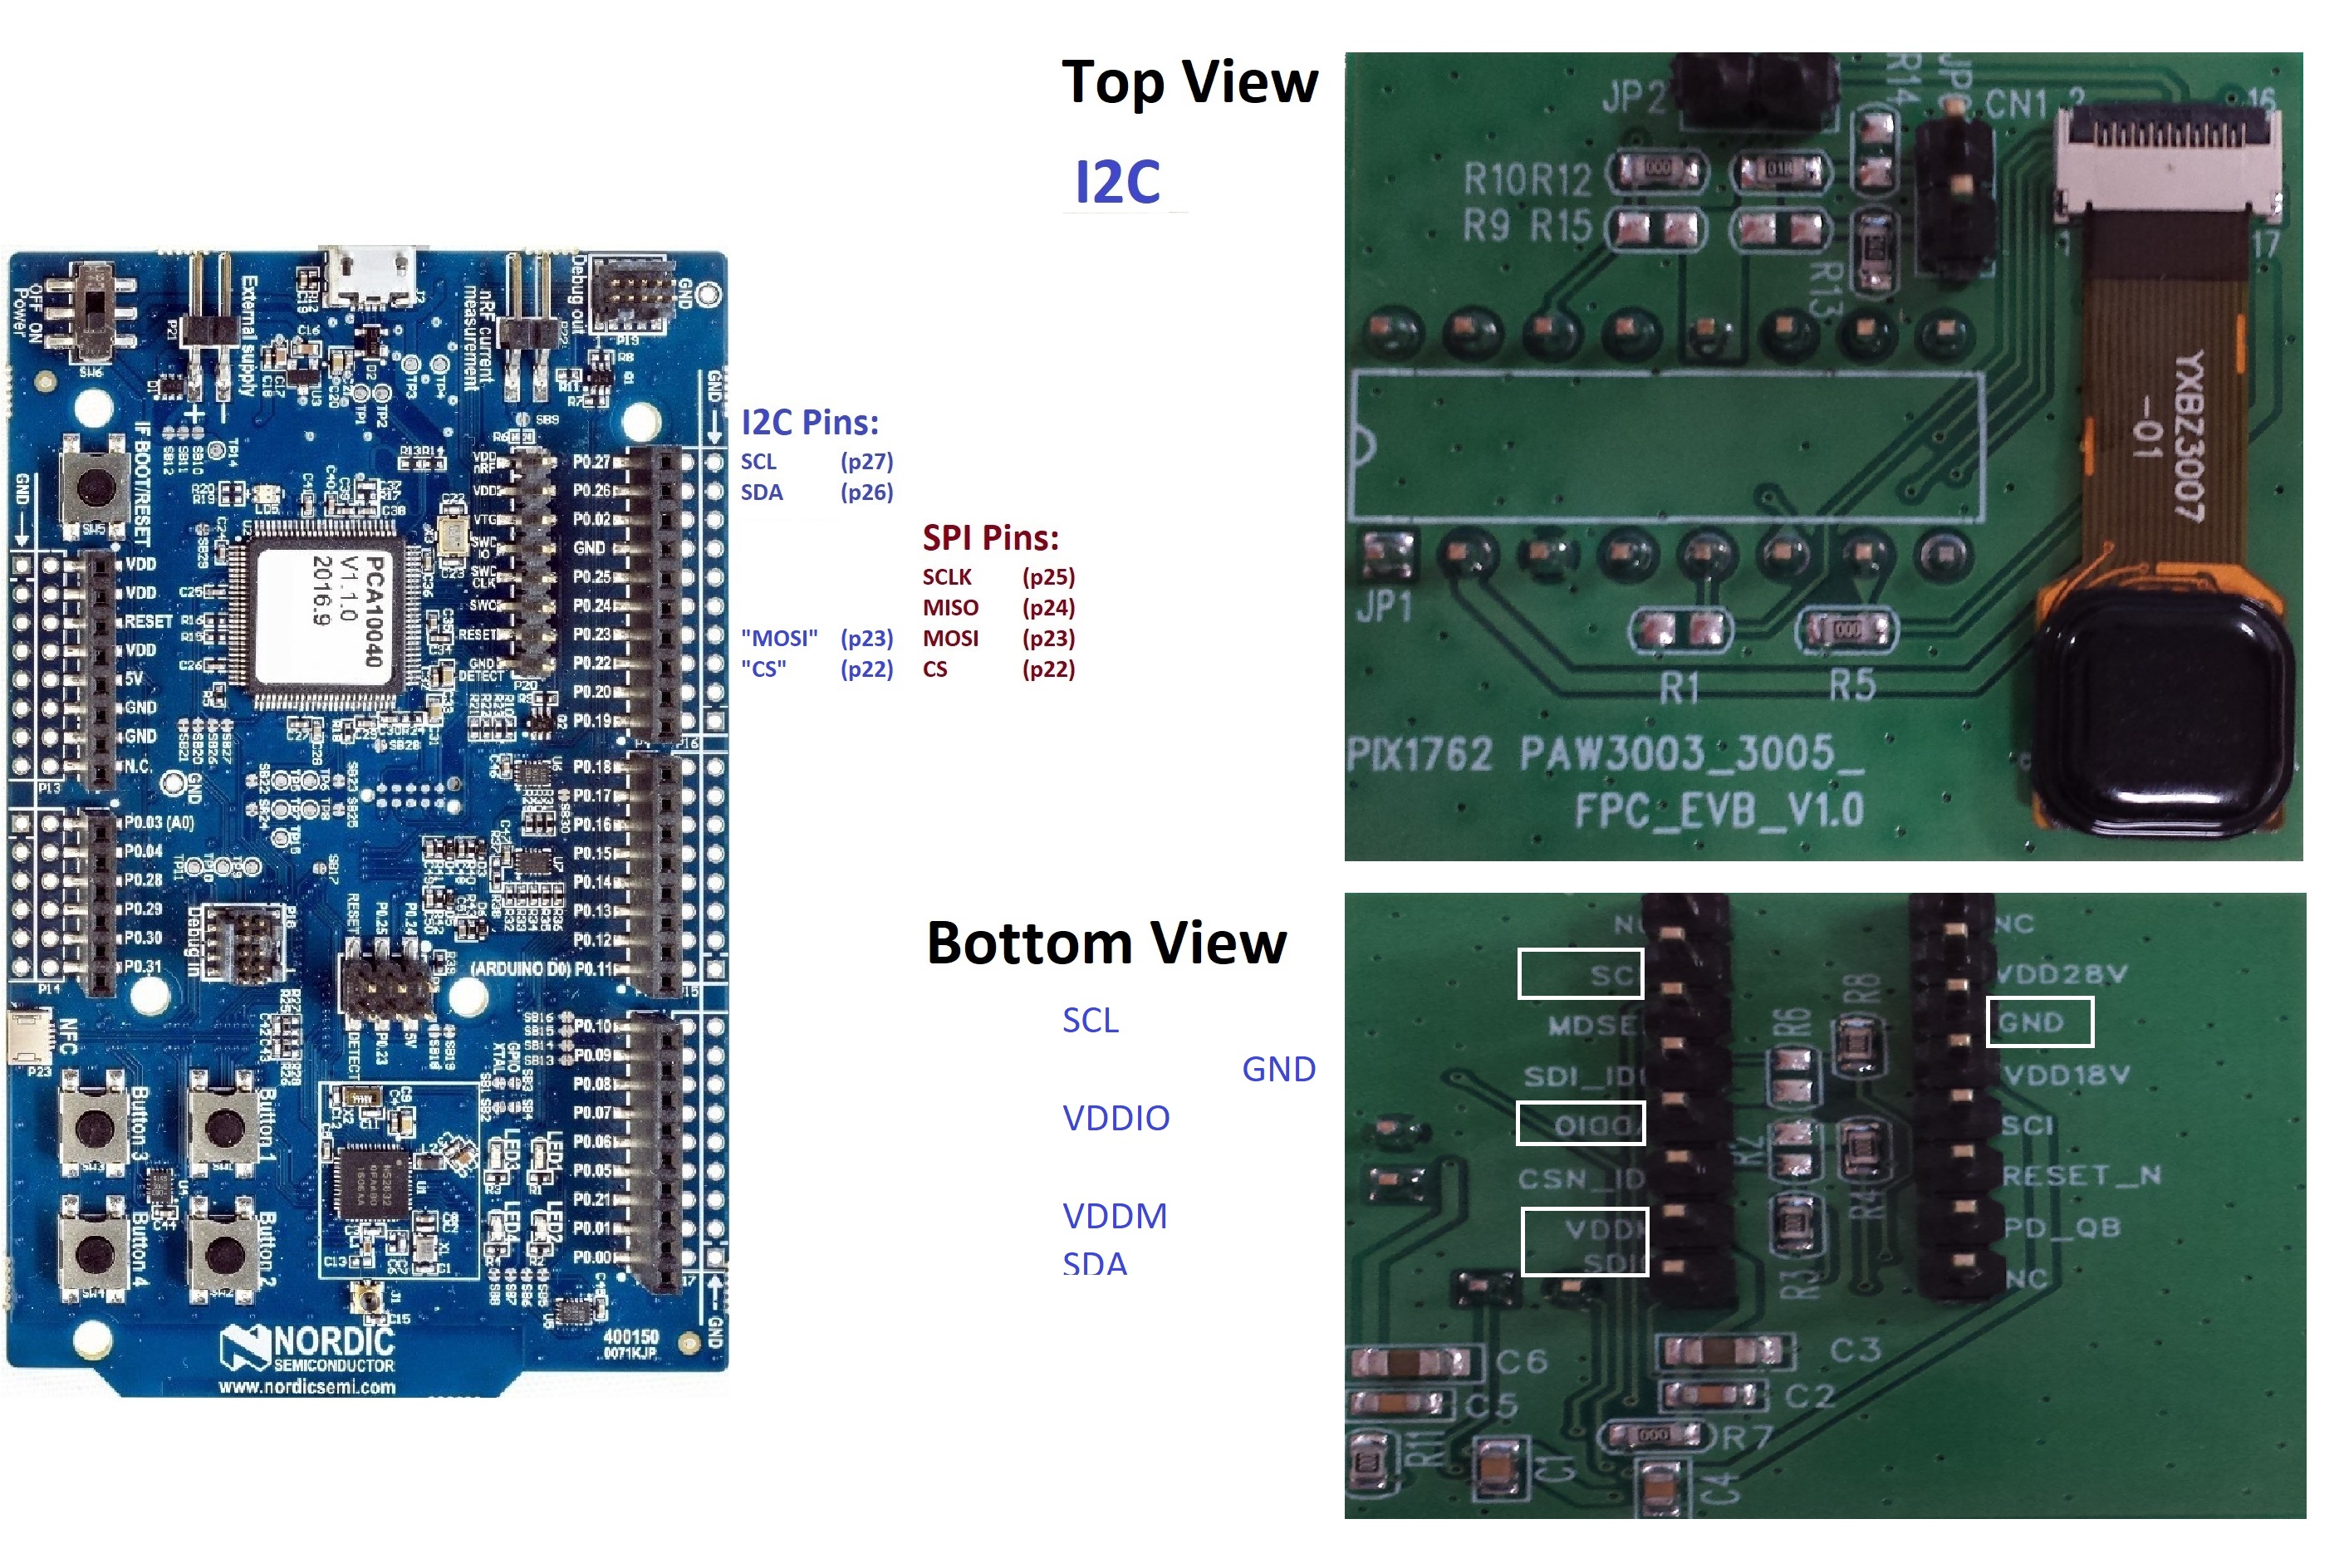
I2C
- VDDM on the PAW3007 evaluation board connects to any 3.0V source.
- VDDIO on the PAW3007 evaluation board connects to any 3.0V source.
- SCK on the PAW3007 evaluation board acts as the SCL pin and connects to pin 27 (p27) on the Nordic nRF52 microcontroller.
- SDIO on the PAW3007 evaluation board acts as the SDA pin and connects to pin 26 (p26) on the Nordic nRF52 microcontroller.
- GND on the PAW3007 evaluation board connects to any GND pin on the Nordic nRF52 microcontroller.
Functional Test
- 1.) You will need a terminal emulator program. The one used in this guide will be Tera Term. If you do not already have it, you can find it at this link:
https://en.osdn.jp/projects/ttssh2/releases/
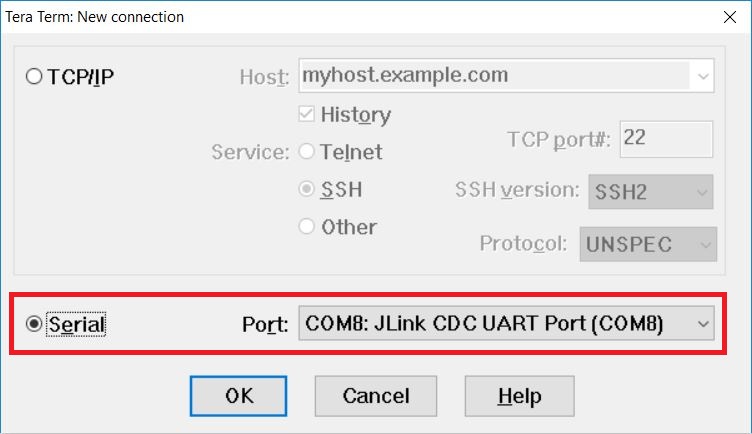
- 2.) Open Tera Term and go to File > New Connection or use the hotkey "Alt + N". Select "Serial" and choose the COM port corresponding to your microcontroller. Then click on "OK".
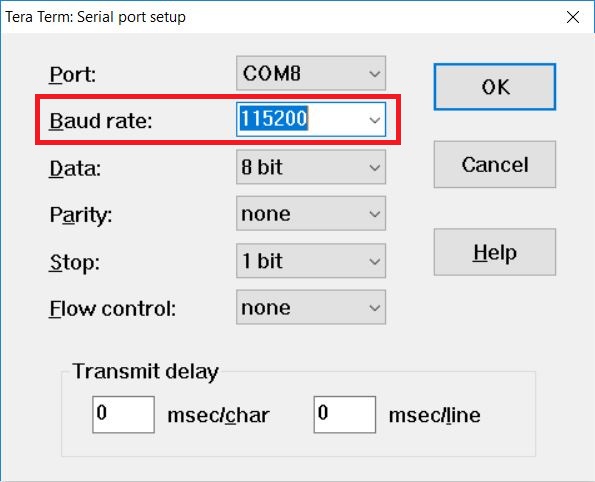
- 3.) Go to Setup > Serial Port and set the baud rate to 115200. Then click on "OK".
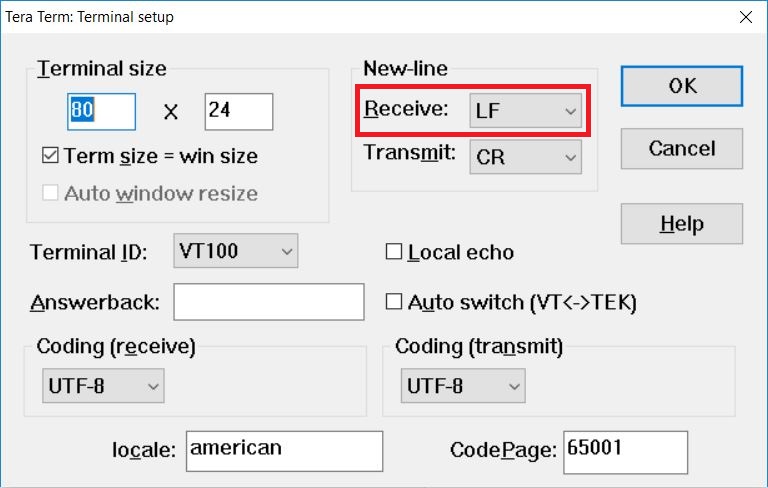
- 4.) Go to Setup > Terminal and change "Receive" from "CR" to "LF". Then click on "OK".
- 5.) With the hardware wired up properly, the firmware loaded into the microcontroller, and the terminal emulator set up, we should now be able to see build information and initialization result on the terminal:

- 6.) Then test the device, we should now be able to see the sensor working. If you slide your finger across the sensor, you should see outputs on the terminal:
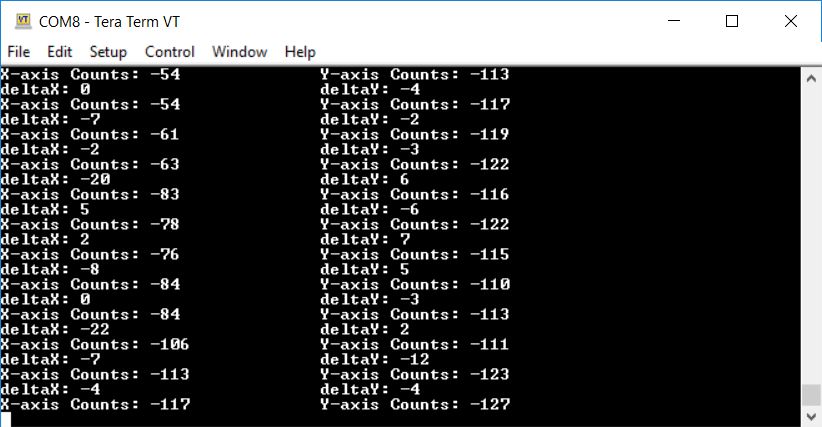
- "deltaX" and "deltaY" show the number of counts detected per report.
- "X-axis Counts" and "Y-axis Counts" show the total number of counts recorded throughout runtime.
- 7.) You can also download a pre-compiled file here: /media/uploads/PixArtHC/OFN_P3007_Demo.NRF52_DK.bin
Thank you for choosing PixArt! If you have any questions, feel free to contact us at: sales_us@pixart.com.
