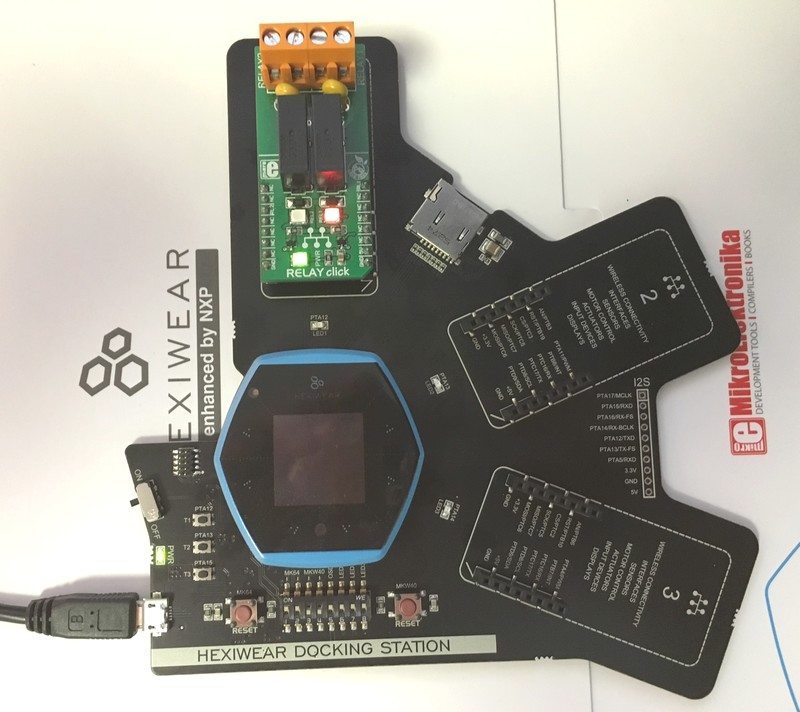
This project demonstrates the use of the Mikroelektronika Click Relay module with hexiwear
Plug Hexiwear into the Docking Station and the RELAY Click to the Click Socket 1
Connect the USB cable to your computer and to the micro-USB port of the Docking Station
Compile the project and copy the binary "Hexi_Click_Relay_Example_HEXIWEAR.bin" in the DAP-LINK drive from your computer file explorer
Press the K64F-RESET button on the docking station to start the program on your board
Then every 500ms each Relay will switch ON then OFF alternately and the associated Orange/Red LED will lite on accordingly

Revision 0:b492a09a523e, committed 2016-08-24
- Comitter:
- GregC
- Date:
- Wed Aug 24 22:27:49 2016 +0000
- Commit message:
- Click Relay example for Hexiwear
Changed in this revision
diff -r 000000000000 -r b492a09a523e .gitignore
--- /dev/null	Thu Jan 01 00:00:00 1970 +0000
+++ b/.gitignore	Wed Aug 24 22:27:49 2016 +0000
@@ -0,0 +1,4 @@
+.build
+.mbed
+projectfiles
+*.py*
diff -r 000000000000 -r b492a09a523e img/uvision.png
Binary file img/uvision.png has changed
diff -r 000000000000 -r b492a09a523e main.cpp
--- /dev/null	Thu Jan 01 00:00:00 1970 +0000
+++ b/main.cpp	Wed Aug 24 22:27:49 2016 +0000
@@ -0,0 +1,20 @@
+#include "mbed.h"
+
+DigitalOut relay1(PTA10);
+DigitalOut relay2(PTC4);
+
+// main() runs in its own thread in the OS
+// (note the calls to Thread::wait below for delays)
+int main() {
+    while (true) {
+        relay1 = 1;
+        Thread::wait(500);
+        relay1 = 0;
+        Thread::wait(500);
+        relay2 = 1;
+        Thread::wait(500);
+        relay2 = 0;
+        Thread::wait(500);
+    }
+}
+
diff -r 000000000000 -r b492a09a523e mbed-os.lib
--- /dev/null	Thu Jan 01 00:00:00 1970 +0000
+++ b/mbed-os.lib	Wed Aug 24 22:27:49 2016 +0000
@@ -0,0 +1,1 @@
+https://github.com/ARMmbed/mbed-os/#d2202045ac8f2fc63836a5b7131c9b56ac58f06a