LinkSprite JPEG Color Camera TTL interface - Infrared (SEN-11610)
Automatic Infrared Camera
Summary
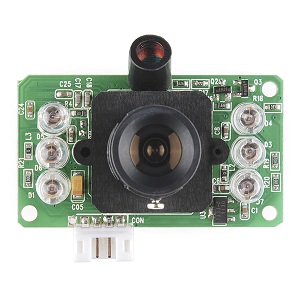
This camera takes pictures according to the light in the room. If sufficient light is detected, then a typical color picture is taken; however, if little to no light is found, an infrared picture is taken with a very cool "white effect". Additionally, the camera can be set to take a single picture or continuous pictures every couple seconds.
The IR still camera:
Info
The camera works via RS-232 connecting to a computer or a embedded system. It takes JPEG pictures and its command transmissions are identical to that of the Link Sprite JPEG camera (LS_Y201) that is not infrared.
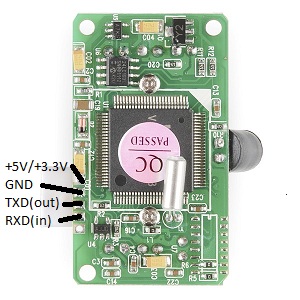
The pin layout for the device:
The user manual for this camera can be found here:
http://dlnmh9ip6v2uc.cloudfront.net/datasheets/Sensors/LightImaging/UserManual.pdf
To purchase this part, visit Sparkfun or a similar website:
https://www.sparkfun.com/products/11610
How to Use: Camera to Computer
To use on a computer, Link Sprite provides a simple test program as long as you create an account with them (don't worry, it's free!). To download the test program, simply follow this link and hook up the JPEG camera to your computer via RS-232: (Note: A null modem adapter is required to get the camera to work via RS-232 in this fashion!)
http://www.linksprite.com/download/showdownload.php?id=36&lang=en
How to Use: Camera to Embedded System
To use via an embed, the pins should connect accordingly:
| Embed | Camera |
|---|---|
| P9(Tx) | Rx(in) |
| P10(Rx) | Tx(out) |
| VU(+5V) | +5V |
| GND(0V) | GND |
The code I used for this demonstration is an edit of Hiroshi Yamaguchi's previous code for a JPEG Camera that is not infrared. In order to successfully run this code, this library is required, but it is already included in the example below for convenience:
Import libraryJPEGCamera
Interface for LinkSprite JPEG camera module LS-Y201
The sample code below will take four pictures and store them on the embed. The infrared ability will automatically kick on if dark without any extra code needed. When the program is done, you can import the pictures to verify the process was successful. Here is the code used for my example:
Import programInfraredCameraExample
Takes four pics and stores them on the embed. Light not required as built in infrared feature is automatic!
InfraredCameraExample
#include "mbed.h"
#include "JPEGCamera.h"

DigitalOut myled1(LED1); //show successful picture was taken
DigitalOut myled2(LED2); //show end of sequence
DigitalOut myled3(LED3); //show picture take failed
DigitalOut myled4(LED4); //show camera is not ready

int main() {
    JPEGCamera camera(p9, p10); // TX, RX
    LocalFileSystem local("local"); //save images on mbed
    Timer timer;
    timer.start();
    camera.setPictureSize(JPEGCamera::SIZE320x240);

    for (int i = 1; i < 5; i++) {
        if (camera.isReady()) {
            char filename[32];
            sprintf(filename, "/local/pict%03d.jpg", i);
            printf("Picture: %s ", filename);
            if (camera.takePicture(filename)) {
                while (camera.isProcessing()) {
                    camera.processPicture();
                }
                myled1 = 1; //show successful picture was taken
                wait(2.0);
                myled1 = 0;
            } else {
                printf("take picture failed\n");
                myled3 = 1; //show picture take failed
                wait(2.0);
                myled3 = 0;
            }
        } else {
            printf("camera is not ready\n");
            myled4 = 1; //show camera is not ready
            wait(2.0);
            myled4 = 0;
        }
    }
    myled2 = 1; //show end of sequence
    wait(2.0);
    myled2 = 0;
    printf("time = %f\n", timer.read());
}
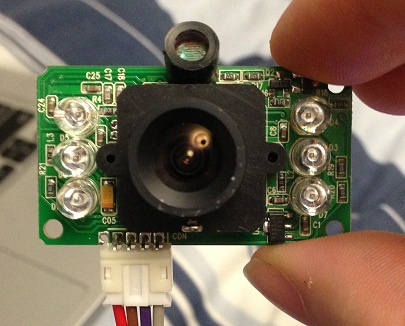
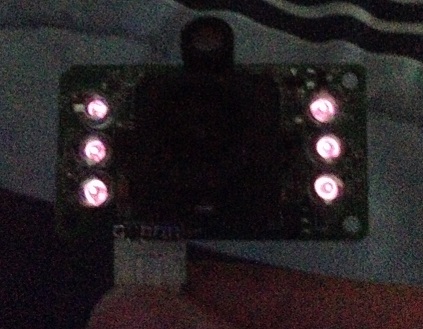
To demonstrate the new infrared feature, I took some pics in light and then in dark of the exact same objects. The results are as seen below:
In the light:

In the Dark:

Conclusion
This camera is quite a useful gadget as it provides eyes in the darkness! I hope my example is useful for building larger applications and would love to hear about what kind of ideas you guys may have for this device. Thanks for reading!
7 comments on LinkSprite JPEG Color Camera TTL interface - Infrared (SEN-11610):
Please log in to post comments.

Hello All,
I am doing project based on Y201 camera. I am interfacing the camera with smart fusion using Uart interface. I am facing problems. Could any one please help.. I have the following doubts.
As part of taking picture,
I am sending
1. Take picture command 2. Read picture file size. I am getting 49 bytes as read picture file size.. Can I know what is might be the problem.
Second problem:
First I am giving reset command. 2. When I gave take picture command next, I am not getting the expected response from the camera. Could I know when I can call reset.
I read I should call reset only after change resolution of the picture. Is it a constraint. Please give your valuable feed back.
Could you please let me know what commands i should give for taking the picture and reading the contents of the captured picture. thanks..