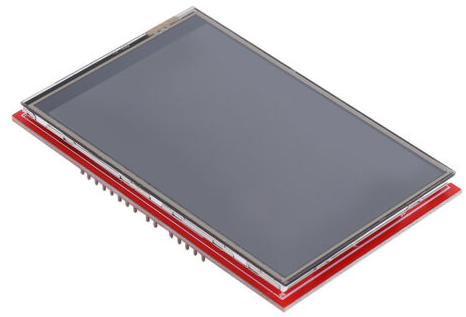
3.5" inch TFT LCD Display Module 480X320 driven with FSMC.
TFT LCD Display Module 480X320 driven with FSMC
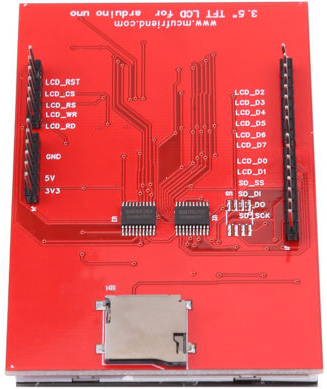
I have recently bought a 3.5" inch TFT LCD Touch Screen Display Module 480X320 with a www.mcufriend.com label on the back side. The display was equipped with an 8bit parallel interface. First I decided to test it with the UniGraphic library using the BUS_8 protocol. The display was very slow but improved when I switched to the PAR_8 protocol. Because I heard about the possibility to use a Flexible Static Memory Controller (FSMC), built into some STM MCU's, to drive LCD's (read/write to LCD's memory rather than to an external SRAM) I thought it would be a fun to try it out.

Below is the brief story of what I did:
- Created a project for my STM32F407VE board in the STM32CubeIDE
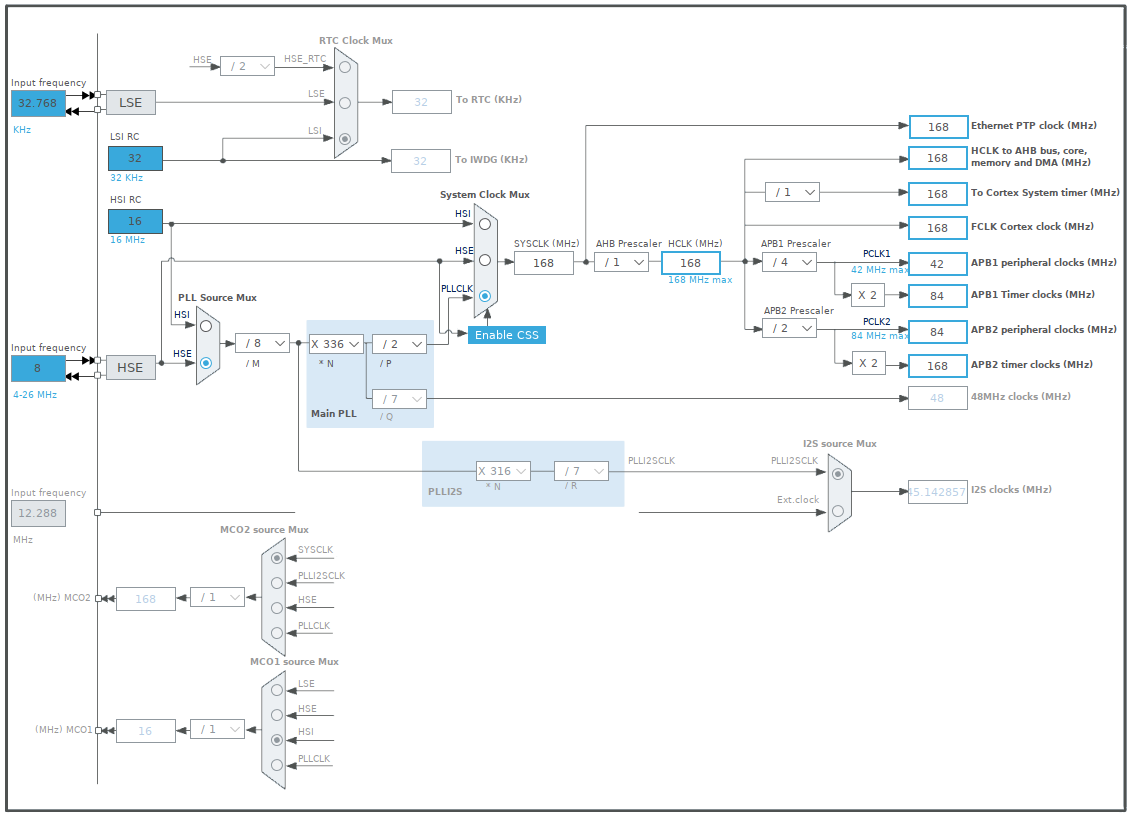
- Set the
Clock Configurationto match the one used by Mbed for the Seeed Arch Max board:
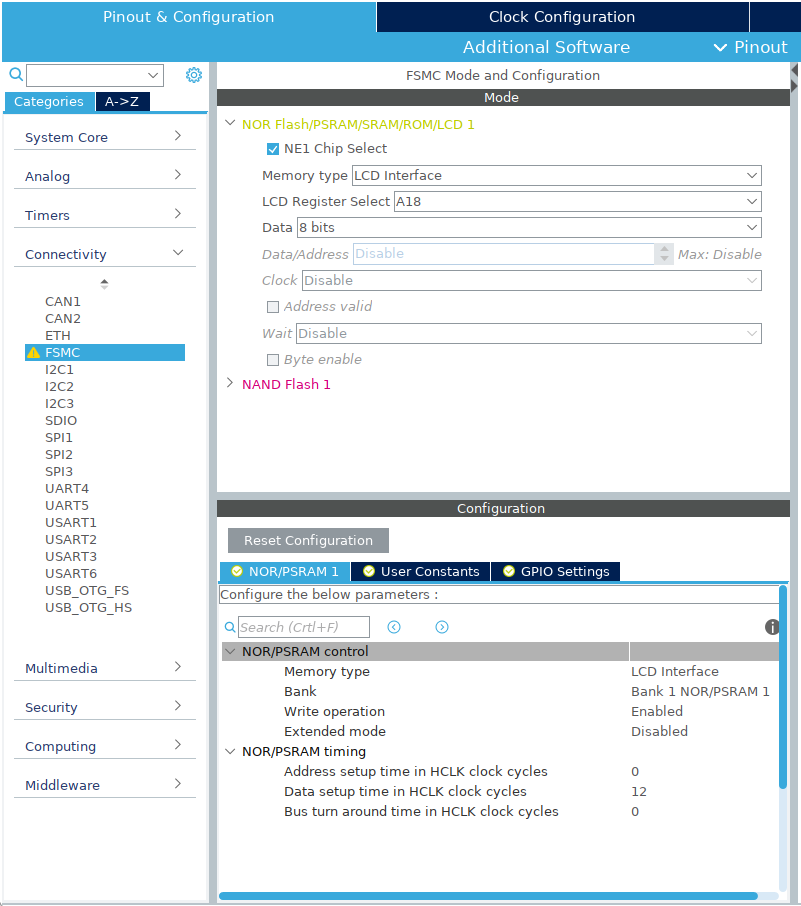
- Selected
FSMCin theConnectivitycategory and configured it as below:
- Let the
STM32CubeIDEgenerate the code (files). - Created a new program for the Seeed Arch Max target in the Mbed Online Compiler by selecting a
mbed os blinkytemplate. - Replaced the
main.cppwith themain.ccontent of theSTM32CubeIDEproject. Copy & Pastedthe other files with codes from theSTM32CubeIDEproject to the online compiler project.- Renamed and modified:
"stm32f4xx_it.h" to "stm32f4xx_it_msp.h"
"stm32f4xx_it.c" to "stm32f4xx_it_msp.c" - Added the UniGraphic library to the online compiler project.
- Extended the
UniGraphiclibrary with aFSMC_8protocol and replaced theTFT::set_orientation(int orient)function with the one used bymcufriendfor arduino. - Modified the
main.cppas needed.
 |  |
Wiring
| STM32F407VE | TFT LCD module |
|---|---|
| +3.3V | 3V3 |
| GND | GND |
| PB_12 | LCD_RST |
| GND | LCD_CS |
| PD_13 (RS) | LCD_RS |
| PD_5 (WR) | LCD_WR |
| PD_4 (RD) | LCD_RD |
| PD_14 (DB00) | LCD_D0 |
| PD_15 (DB01) | LCD_D1 |
| PD_0 (DB02) | LCD_D2 |
| PD_1 (DB03) | LCD_D3 |
| PE_7 (DB04) | LCD_D4 |
| PE_8 (DB05) | LCD_D5 |
| PE_9 (DB06) | LCD_D6 |
| PE_10 (DB07) | LCD_D7 |
Results
| Execution times | ||
|---|---|---|
| Used protocol | BUS_8 | FSMC_8 |
| Operation \ Time | ms | ms |
| Clear | 2283.980 | 38.454 |
| Plot | 192.066 | 11.365 |
| 8bit BMP | 63.805 | 41.338 |
| Large Font | 163.872 | 7.895 |
| Sparce pixels | 2072.265/1458.051 | 74.107/52.168 |
| 16bit BMP | 2288.589 | 59.904 |
README.md
- Committer:
- hudakz
- Date:
- 2020-09-25
- Revision:
- 1:47c996032a9e
- Parent:
- 0:fa952828e34c
File content as of revision 1:47c996032a9e:

# Blinky Mbed OS example
The example project is part of the [Arm Mbed OS Official Examples](https://os.mbed.com/code/) and is the [getting started example for Mbed OS](https://os.mbed.com/docs/mbed-os/v5.14/quick-start/index.html). It contains an application that repeatedly blinks an LED on supported [Mbed boards](https://os.mbed.com/platforms/).
You can build the project with all supported [Mbed OS build tools](https://os.mbed.com/docs/mbed-os/latest/tools/index.html). However, this example project specifically refers to the command-line interface tool [Arm Mbed CLI](https://github.com/ARMmbed/mbed-cli#installing-mbed-cli).
(Note: To see a rendered example you can import into the Arm Online Compiler, please see our [import quick start](https://os.mbed.com/docs/mbed-os/latest/quick-start/online-with-the-online-compiler.html#importing-the-code).)
1. [Install Mbed CLI](https://os.mbed.com/docs/mbed-os/latest/quick-start/offline-with-mbed-cli.html).
1. Clone this repository on your system, and change the current directory to where the project was cloned:
```bash
$ git clone git@github.com:armmbed/mbed-os-example-blinky && cd mbed-os-example-blinky
```
Alternatively, you can download the example project with Arm Mbed CLI using the `import` subcommand:
```bash
$ mbed import mbed-os-example-blinky && cd mbed-os-example-blinky
```
## Application functionality
The `main()` function is the single thread in the application. It toggles the state of a digital output connected to an LED on the board.
## Building and running
1. Connect a USB cable between the USB port on the board and the host computer.
2. <a name="build_cmd"></a> Run the following command to build the example project and program the microcontroller flash memory:
```bash
$ mbed compile -m <TARGET> -t <TOOLCHAIN> --flash
```
The binary is located at `./BUILD/<TARGET>/<TOOLCHAIN>/mbed-os-example-blinky.bin`.
Alternatively, you can manually copy the binary to the board, which you mount on the host computer over USB.
Depending on the target, you can build the example project with the `GCC_ARM`, `ARM` or `IAR` toolchain. After installing Arm Mbed CLI, run the command below to determine which toolchain supports your target:
```bash
$ mbed compile -S
```
## Expected output
The LED on your target turns on and off every 500 milliseconds.
## Troubleshooting
If you have problems, you can review the [documentation](https://os.mbed.com/docs/latest/tutorials/debugging.html) for suggestions on what could be wrong and how to fix it.
## Related Links
* [Mbed OS Stats API](https://os.mbed.com/docs/latest/apis/mbed-statistics.html).
* [Mbed OS Configuration](https://os.mbed.com/docs/latest/reference/configuration.html).
* [Mbed OS Serial Communication](https://os.mbed.com/docs/latest/tutorials/serial-communication.html).
* [Mbed OS bare metal](https://os.mbed.com/docs/mbed-os/latest/reference/mbed-os-bare-metal.html).
* [Mbed boards](https://os.mbed.com/platforms/).
### License and contributions
The software is provided under Apache-2.0 license. Contributions to this project are accepted under the same license. Please see contributing.md for more info.
This project contains code from other projects. The original license text is included in those source files. They must comply with our license guide.